Showing posts with label tests. Show all posts

Wednesday, September 12, 2012

Making some Progress,

I fired the bottom ring of my little, newly hooked up kiln yesterday! Yippee! 
 So, now I have a bit of bisque, including some test cylinders,
 Already the underglaze colors look brighter, so it will be exiting to see them with the glaze over top.  I have 2 glazes that I want to test, one from Lisa in Savannah, and one from the Digital Fire/Plainsman web-site. I went to Tree (the pottery supply place here in Saskatoon) and what a co-incidence, she had a test cylinder with the exact same glaze on it that I meant to test!!  (the frit that I requested is an odd one, and she had just got some of it in to mix up this same glaze) 

(the underside of some little dishes that I made some weeks ago)
So after seeing the sample of the glaze, I am super excited to try it myself!
 One of the things that I threw in my first bisque firing were these three flat shapes that I cut out to use as push molds for more little trays.  these will be a bit larger than the ones in the previous photo,, about 5" x 8" or so,
Of course I fired another load today.
I wonder if my little half-kiln would make it up to cone six before I get the new elements....

Saturday, April 28, 2012

"Mug Analysis"

-- being quite a blow by blow description of what went down on this first batch of mugs...

1.  my favorite at the moment, as you can tell from the coffee drip.  I like the color off this green, but there was some crawling.  I think because I used the black wash under the glaze, which could have acted like dust, and Lisa said that this is sort of a finicky glaze.

2.  Least favorite.  I don't like the great big leaf being so dark against the lightness of the flower.  Also, the flower could be outlined a bit more.  Also, the mugs look a lot better with a more pronounced foot "bump"

3. again, the carved drawing lines didn't pick up the black wash very well. 

4.  this looks a lot like a Mel Bolen mug to me.  On the positive side, the incised lines did pick up the black quite well, and there is also a nice halo of grey around the slip trailed dots!
same mug, shot of handle
5.  I like this mug, but the transparent glaze looks quite milky.  These were all on the bottom shelf of the kiln, so maybe it was cooler down there.  I wonder if I should re-fire them and see what happens
here you can see that the glaze is pretty stony down on the bottom edge.  Do you think that re-firing makes a piece warp more?
6.  The background of the main section on this one was rose underglaze.  Now it appears sort of grey,
7.  the turquoise blue seems pretty reliable.  Haven't got a clue what the color was on the top edge.
8.  light blue and grey , the decorative lines are pretty faint.
9.  This one is supposed to be orange.  again, the glaze is pretty milky,
where it was thinner on the top edge, you can see the color a bit better.  Re-fire? I sort of like this shape, and the bottom edge,
10.  Another one with this green glaze,  lots of crawling. These ones I brushed wax on the circles, and along the straight vertical edge, wiped away the dry clay to get the relief.  I really like this effect. 
11. Again, I really like the glaze trailed stuff.

12
and just for something different, a tile.  it had mishima where the black is.  I like the tree on the bottom right edge.  I think I might try it in slip trailing with charcoal grey slip.  
That's the initial round-up.  Feedback is welcomed.

Wednesday, April 4, 2012

Glaze testing

Spent the afternoon at the clay spot studio. It was quite a productive session. Several pieces had been bisque fired, and so I tried to glaze them somehow. Because the glazes are new to me I tried to keep a record of what I was doing but this soon became pretty hit and miss. Lisa has a nice reference set of tiles that are very helpful and so I hope that a couple of the pieces will turn out okay. I haven't done much with double dipping pieces before so I tried that on a few things-- note to self-- be sure to let them dry thoroughly before yanking so as not to disturb the glaze.
Then I tried some glaze trailing with one of those bulb things you squeeze that has different size ends. This was pretty messy. It has potential but I would have to practice a lot to avoid runs and gain some sort off control over where it goes.
Lisa gave me a bit of gerstley borate and so I mixed it half and half with the glaze stains I got in Asheville. I did some brushwork with it and also tried some banding on the wheel with it in the squeeze bulb thing and it worked okay.
I did some dots with dark blue and dark green glaze on lighter colored glazes. By that time I was getting a bit confused.
I did a few more glazy things and then realized I had come to the end. I washed the glaze off from one of the bowls since it was definitely ugly.
After all of that I was in need of a bit of fun. So I got a new bag of clay-- a different kind from before. It is called Loafer's glory or some such thing and it is a mid fire combo of porcelain and stoneware.
I loved it! It was creamy and smooth (except for a few bits of sponge it had picked up from the table when I was wedging it). I threw some cylinders to use for mugs. They have thin bottoms so that I won't need to trim them very much. They are sort of mel's shape, since I think that over time it is the mug shape that I like best. Also Richard likes that wide based shape for stability.
For the next glazing session I would like to work in some of the celadon glaze in combination with the satin white and maybe some blue accents.
I don't mind a bit of glazing but so far I think that I like using the undergazes better on the leather hard stage. I don't like handling the bisque as much. Also, I really like carving into the clay, whether through slip or not.
Also it might be interesting to try the shellac resist where you wipe away clay, but use something like polymer paint medium or wax.
So many things to try in order to find a combination that works that is fun to do and is aesthetically appealing.

Friday, March 30, 2012

Underglaze Test Tiles

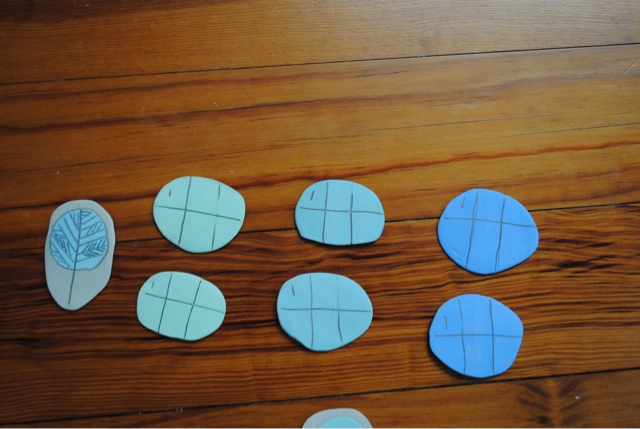
I purchase several colors of Amaco Velvet underglaze and have made some test tiles
Each tile is about 2 x 3 inches, and I made 2 with each color. Each has 3 areas, with one, two and three coats of underglaze. One of the tiles I will antique after it is bisqued, the other will be left plain. Then, I'll glaze half or each tile with clear glaze, to see the difference with it under glaze or just plain when fired to cone six.
I did some other tiles with some test patterns, and some with some carving on them. I have a couple where I carved over the underglaze, and some where I carved first, and then put underglaze over the carving. Will the antiquing pick up differently?
I also made a few hand-built mugs today.
I will be very glad when the studio is open again, as it is much easier to make real things in a studio than at a small newsprint covered kitchen counter.
I have noticed that I am quite enjoying the incising/carving aspect now. It seems a bit different to do sgraffito on hand built forms than on a thrown form, somehow.
Perhaps tomorrow I'll take photos of the test tiles.

Wednesday, March 28, 2012

Sequences

I'm trying to figure out some sort of process that combines slip/underglaze with sgraffito and antiquing.  possibly covered in a clear glaze
there seem to be endless permutations.
In my navy and white series, I made a form, let dry, applied large areas of slip, and carved when damp.  bisque fired, then glazed with clear.  5 steps.

so there are various processes that can be applied at various stages of the piece based on hardness, such as:
1. when soft
 impressed decoration

2. When the clay is leather hard
carving on base clay
large areas of slip/underglaze
brush strokes of slip/underglaze
mishima
underglaze pencil drawing
sgraffito through slip/underglaze to the clay layer

3. when the clay is bone dry
large areas of slip/underglaze (dip or brush)
brush strokes of slip/underglaze
slip trailing
underglaze pencil drawing
sgraffito through slip/underglaze to the clay layer

cuerda seca


3. When the clay is bisque fired
before glazing:
"antiqued" with brushed on/off oxides or stains
re-application of slips or underglazes
    (can go directly to cone 6 firing without additional glaze)

4. raw glazed:
overglaze decoration with stains/oxides using brush or sprayer

overglaze decoration with underglazes
sgraffito through overglaze decoration to the glaze layer
layered glazes, dipped, brushed or trailed

5. cone 6 fired
decals or lustres
refire to a different temp
 
I made a table on word-perfect to summarize this, but am unable to copy it to this format.
It is important to note that some techniques can be repeated numerous times at each stage of dryness, ex. apply slip, let dry , apply more slip or underglaze, or you could re-bisque many times to fix the layers of underglaze decoration.  I also didn't include resists, since I'm not too interested in using them right now.
the techniques are all based on cone 6 electric kiln firing, so I haven't included such things as burnishing, waxing, or different atmospheres like pit firing, raku, soda or salt, flashing slips,
also, the above are all ceramic processes, and so I haven't written down the option of painting with "room temperature" paints, such as acrylics,

So in Practical terms, what I'm wanting to do is make a series of test tiles in order to find the sequences and combinations that create the color and texture that I desire in the finished pieces.
What I'm hoping to avoid are the several hour test tiles, -- those pieces that one blithely works through, assuming that what one envisions will really happen..... then the colors turn out to be quite different than expected, the underglazes are transluscent instead of opaque, etc, etc,

Also, I need to make them based on the processes that I enjoy doing!
i.e.  I like to carve leather hard clay, brush on colors, sgraffito through color, dip in glazes,
I do not like to: handle it too much when raw-glazed (dusty, smudges) no lustres (smelly, toxic)

Although this seems really simple, it is actually a lot to keep in mind, and the number of test tiles increases exponentially when you want to answer a question!