Showing posts with label underglazes. Show all posts

Thursday, February 7, 2013

Critique #2

On the whole, I really enjoy making these little trays. They are quite a nice shape to try out ideas on.

Often the underside is quite different than the top. I like the way the signature is in a cartouche.

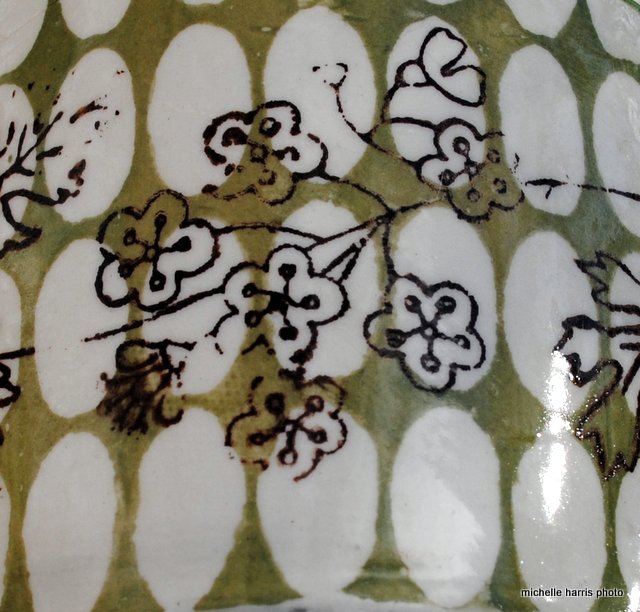
It can be surprisingly tricky to paint an even edge when using 3 coats of underglaze. the circles are trailed dots, using wet newsprint circles as guides.
mishima with red underglaze, trailed white slip over pale blue underglaze.
I like trailed lines and dots, it seems. I like a dotted line better than a solid outline, in general, unless it is mishima.
the same flowers as in the dish above, but this time using trailed underglaze instead of mishima,. the rabbit shape was masked off with newsprint, then outlined in brown.
I rather like this one. It uses one of my favorite screens, with the numbers on it. I also like the dots in turquoise over the deep yellow. I like the fanning of the white trailed lines over the dark blue.
this is the underside of the same dish.

This is the link to Mud Colony to see what others are doing this week! http://mudcolony.blogspot.ca/

Saturday, January 19, 2013

Silk-screening on Tall surfaces

Yes, I mostly have done stencilled decoration on "tall" things, such as vases, the one below on left is about 9 inches tall.  
 but really, if you lay the piece on it's side, it's just another curved thing.
these are all just bisque,

layers of images,

some of my screens


Wednesday, October 17, 2012

A Little More Each Day

And it's Mud Colony time again! see what other potters are doing, here

Well now that my kiln is operational again, I've been firing it pretty steadily with the stuff I had been accumulating from making things all summer.  It's pretty exciting to see the colors come to life, and I can't stop feeling so happy about the success of the clear glaze.
Today was a gorgeous autumn day, so I was able to take some photos outside.
What I need to do is to try to analyze which colors work well together, what shapes I want to pursue,

two similar cups, with the same color combinations, although the mugs are different shapes, they are about the same size
tray, about 5" x 9", this sort of sagged in the middle,
I liked the way the greens interacted on the silk-screened part of this piece,
I like the buttery yellow background, and the rest is brushwork on this bowl  I might try to use this pattern again
close-up of a couple of layered screens.  I like using some basic shapes as backgrounds.  I also think that the dark brown underglaze is one of the most useful colors.
an artsy shot from above, of some of the little slab vases.  I really enjoyed making these shapes, plus they give a great surface for all sorts of decorative techniques
this shows just how luscious the glaze is. 
thrown mug, hand-built mug.  The glaze covers the rims of the thrown pieces really nicely, but some of the slab pieces are a bit rough on some edges.  I think I need to either smooth them more, or make sure that there is enough glaze on them.  This might also be that the glaze doesn't cover as thickly when there is underglaze on the rim.

handbuilt mug, I like the combo of colors
Maybe I need to make some sort of reference chart to refer to.  It seems that I'm always wanting to make charts...
 Maybe I could pull a lot of info together into a photo collage (or two or three)
four views of one mug. 
 Thanks for stopping by!

Friday, October 12, 2012

Notes on some Glazed stuff

Hello, If you arrived here from the Mud Colony site, thanks for the visit.  If you don't know what the Mud colony site is, you can go to it here.  it is a round-up of some other pottery blogs, and it is fun to see what others are up to each week.

I arrived back in Saskatoon on Tuesday, so I have switched back to the pottery that I do here, and left the clay that I was working on in Savannah there. 
In my absence Richard had picked up the new elements for the kiln, so I immediately installed them on Wednesday morning, and did their first firing as a bisque fire.  That went well, so yesterday I did a glaze firing. 
the unfired glaze makes them all look a uniform white,

It was nice to use the whole kiln, even though it is a little kiln. 
This morning I unloaded it, and these are some of my first impressions. 

the unloading of the kiln, minus the bowl that is stuck to a shelf.

the one on the left was fired earlier, up to a cone 5.  It seems that at the little bit higher temperature, the yellow is a bit less intense.

I like the little scene.  I find that this green turns into a muddy kind of green. I think it is the Amaco velvet underglaze, Leaf Green.  I hope to find a better green that stays a bit more cheery.
Handbuilt mugs.  On the whole, they seem all right.  I like the hollow handle on the cup in the foreground. 

A thrown mug.  The silk screening turned out well on the light blue background.  The pinky red is Amaco's Dark red velvet underglaze.  It is more of a dark pink.

The pinkish area on the mug on the left is the dark red underglaze lightened by adding a bit of white to it.  The one on the right is straight out of the jar.
I like the way this pattern turned out.  I must remember to use it again. 
 Well, those are the little memos to myself. 
I have another glaze load starting to warm as I write. 
On the whole, I'm pretty happy with the new clear glaze.  I had items in the firing where the glaze was applied quite thickly, and others where it was more on the thin side.  You can't really tell the difference, so that is good.  There is only a wee bit of pin-holing, although I tend to be pretty careful to check for that before putting the pots in the kiln, and wiping any air bubbles over. No crazing in sight, so it does seem to fit my clay body really well! Hurray! 
I read an article yesterday about how to take better photos, and so I will be trying to improve my set-up soon. 


Saturday, August 25, 2012

Waiting in its various forms

 I have been hand-building and decorating more and more....
(bottoms of cups)
 partly this is because i continue to have some problems with my left hand, which might be carpal tunnel related.  But, the other reason is that I find it quite interesting. 
cups that are firming up before attaching the bases
In the past I made pots primarily by throwing on the wheel.  I find that handbuilding is quite a different experience: 
1. less wedging
2. different type of scraps
3. different shapes are possible
4. different rhythm to the work

 In particular, there is a different type of time-line involved.  In handbuilding, or more specifically, using slab construction, I find that there is a lot of waiting time between each step. 
I throw and roll out slabs, then wait for them to stiffen up before being able to cut shapes from them.
Some shapes are partially constructed, and then have to firm up more before continuing to work on them.  Even when the pot has been assembled, there is still quite a lot of fine-tuning to be done: lots of wiping down of rough edges, or scraping away with a rasp or a trimming tool, or smoothing with a smooth piece of wood or a rubber rib. 
 I also notice that it is quite a lot of fun to press designs into the slabs as I construct the pots.
 It's a form of mishima, I suppose, to paint the impressions with slip and then to wipe away the extra with a damp sponge,
 I've been using a dark grey slip up until this point. 
 On the vases,  I intend to add a colored glaze on the inside of the pot.  The mugs, I painted the insides with underglaze. 
I also am thinking of adding decals to some of them later, although I find it tricky to do long term planning like that.  It is easier for me to do as much to the pot at one time as possible to make it close to being finished.  It seems that there is too long of a gap between starting and finishing a pot to remember what I had planned.

 I am still doing a lot of underglaze decoration.  It too can be a waiting game.  I tend to apply three coats of underglaze to prevent it from looking streaky or translucent when glazed.  Each coat has to set up between applications.  So that means that I am working on several pots at the same time-- maybe 5 or 6.
 And, on another note, I am still waiting on firing all this stuff, since the electrician I found that is willing to come out here to hook up the plug won't be able to come until the second week of september.  : (
Yeah, that's quite a wait. 

 There will be hundreds of pieces by then.......

Friday, July 27, 2012

My Backyard Studio

I am very fortunate that when we bought our house, there was a little heated shed in the back yard,
part of the back yard,
the back yard shed!
(some more of the back yard)
Entering the shed!
This has now been turned into my clay workshop. 
It is not very big, but that's okay, because I don't plan to make very big pieces.
this is my wheel,

 this shows the whole place,
all my decorating underglazes,
 making mugs,
 I am using a mix of techniques to get the patterns onto the clay,
 decorating seems to proceed at quite a slow pace.  Sometimes I look at a piece later and it seems sort of primitive, but it is the most skilled that I can do at the time, so, all I can hope for is gradual improvement to refine it. 
 I have recently added a couple of more items to my regular line up of mugs--  Some slab trays, and some little thrown bowls, and some hand-built vases.
This is one of the shapes of trays.
 I have ordered some new elements for the kiln.
I am also missing my compadres at the Clay Spot in Savannah,